

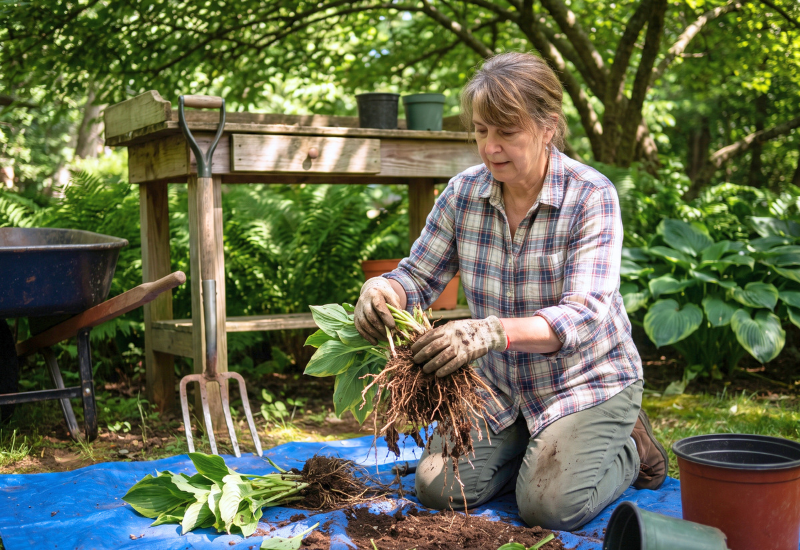
I still recall the first hosta that I pulled up years ago in what was not even my garden but a garden of my older neighbor who had cultivated that plant for over two decades. By the time I got asked to divide the overgrown hosta, it had consumed close to a third of the shade bed of my neighbor. And I was scared of killing the plant. I did not have to be. Hostas are the easiest perennials to divide and that particular clump gave us eleven perfect divisions just in a single day.
And that is the part which people fail to believe until they go through the process themselves; a hosta does not care much about being divided like how we think they would. Each separated eye, with roots and some shade to offer, has all the components required for growing a completely new plant. What an overgrown clump turns into, by the grace of some patience and appropriate time in the calendar, is a dozen new plants in places of your shade garden where you wish to plant them — underneath an old tree, along the north-facing fence, and under the bushes where nothing grows.
The crucial element which is usually missed in most gardening guides and is the difference between making the plant take a few steps back or none at all is timing. Let’s see how and when to do it correctly.
When to Divide Hostas
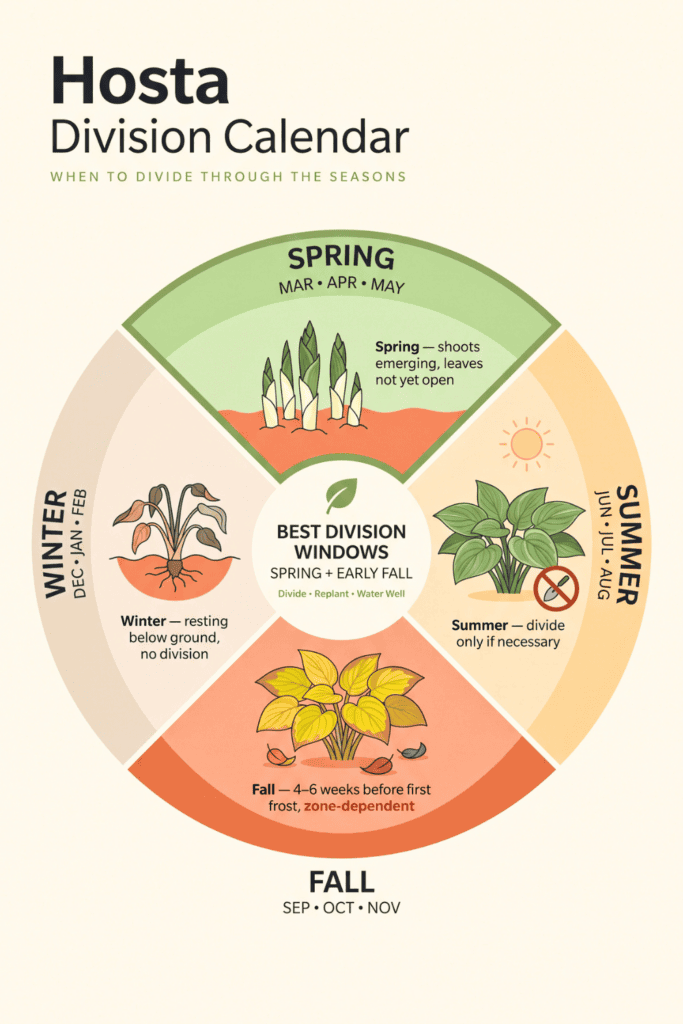
Timing for dividing hostas should avoid blooms and hot weather. This gives you two opportunities, and which one you go with depends on your climate.
1. Dividing Hostas in Spring
As soon as the new shoots (“pips”) push up but before the leaves fully unfurl, you’ve got about a month to work. The plant is coming out of dormancy and putting its energy into roots, which is exactly what you want post-division. A few torn leaf tips are normal — just trim off any that get damaged.
2. Dividing Hostas in Fall
Aim to divide four to six weeks before your first expected hard frost, so the roots have time to establish before the ground freezes. In practice that means:
Zones 3–5: early-to-mid September
Zones 6–7: late September through early October
Zones 8–9: mid-to-late October
Doing this too close would make sure that your divisions are not sufficiently rooted to withstand any harsh winters.
3. Summer (try to avoid it)
This is the worst time to divide your plants. Heat and stress do not make it easy for the plant to grow roots. However, if you do have no choice, try watering your plant deeply for several weeks and keep your divisions shaded during recovery.
Why Divide at All?

Dividing hosta is not simply a matter of propagating new plants but rather of stopping a plant from becoming a victim of its own success. Too many crowns contained in a single area result in competition for moisture and nutrients; thus, the first sign of this problem is small leaves and reduced number of spikes as compared to what the variety should normally produce. Moreover, dividing becomes a way of prevention because of the creation of the perfect conditions for crown rot and other types of fungus infection: dense foliage that blocks airflow and creates moisture in the soil area.
Does Size Matter? Dividing by Cultivar
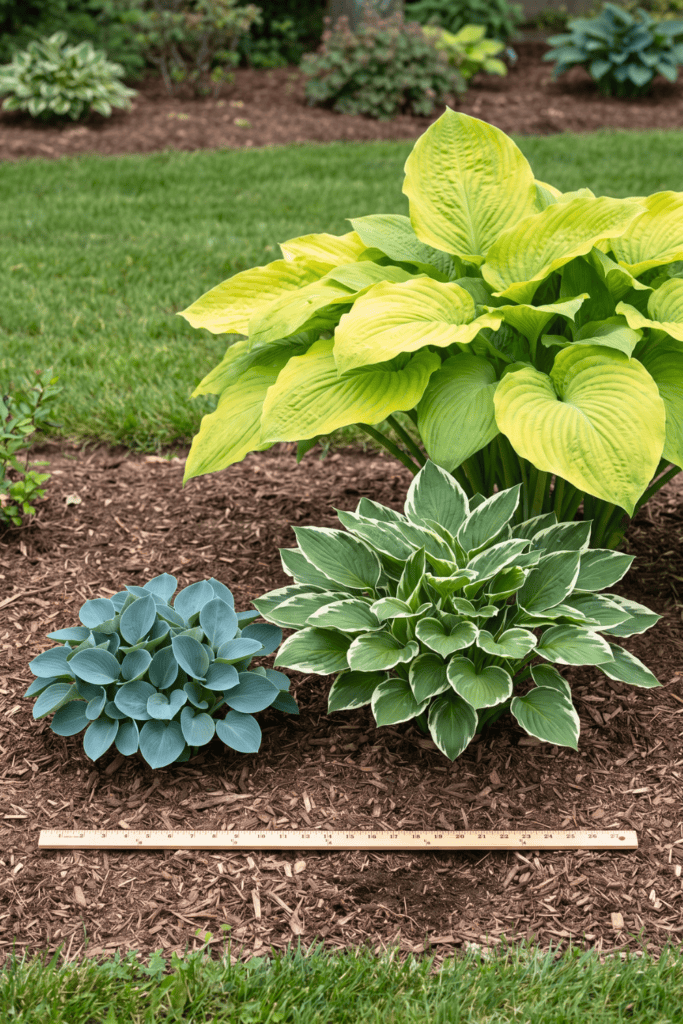
Size varies between hosts, making the size of the cultivar an important consideration.
- Small and miniature (for instance, ‘Blue Mouse Ears’, ‘Mighty Mouse’) – in such cases, the entire clump might easily fit in one hand trowel. Divisions may be quite small – even a single eye that has enough roots to it will establish successfully, but it is worth treating them delicately because small root mass dries quickly when uncovered.
- Medium (this group includes most of the common garden hostas: ‘Patriot’, ‘June’, ‘Francee’) – this is the standard size the most of instruction, including the steps listed below, are intended for. Garden fork is the right tool for the job.
- Large (such as ‘Sum and Substance’ or ‘Empress Wu’) – such plants have large, deeply set roots, and will weigh over 30 pounds after being pulled up. Full-sized spade or even mattock is required to get through the root mass, not to mention that you should not lift a complete clump – instead, divide it into halves or quarters where it stands before lifting. Large division are preferable for large plants.
Tools That Help You Do It

- A digging fork, and not a spade, should be used for picking up medium-size chunks since it will injure less of their root systems than a spade will.
- A sharp and durable knife — you might need an old kitchen knife or a garden / hori-hori knife — that will help to cut between the crowns when they become distinguishable.
- It’s better to have a full-size spade or mattock at hand if you encounter something large enough to put up resistance, otherwise a single garden knife wouldn’t cope with the tough giant root system.
- Clean cuts are important. Don’t forget to wipe your knife between each chunk if it’s leaf-streaking or unusually spotted; hostas can suffer from Hosta Virus X, and a dirty knife is the way it spreads.
But What About That Old, Woody Clump?
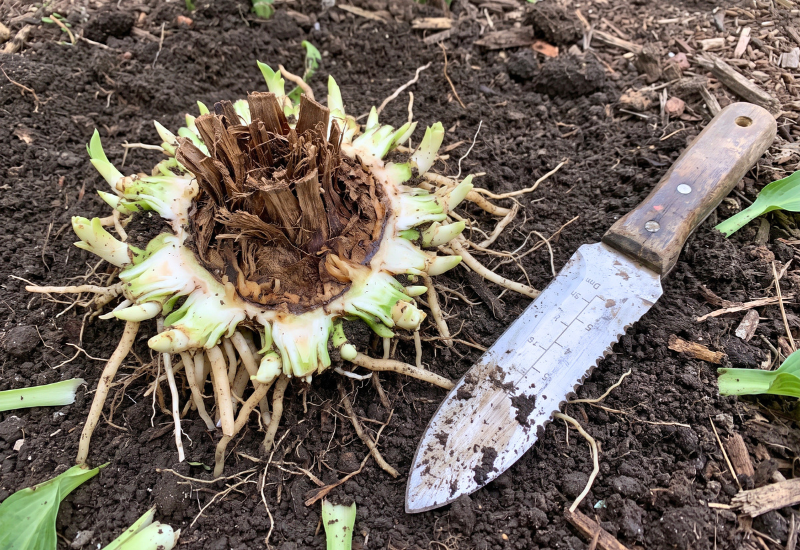
If the crown of your hosta is now barren, weak, or woody and fibrous, like what happens when clumps are not divided for over six years, then you’ve got a dead zone there, and there’s no point in saving it. Just cut out the whole dead center and keep the actively growing parts around the edges only. You will just be wasting a year otherwise.
How to Divide Hostas: Step by Step

- Water one day in advance. Watering your hosta plant a day in advance makes the roots much more manageable.
- Dig around the crown. Cut a wide circle around the plant’s crown, about 6-8 inches, using a spade or a pitchfork. Make sure that the cut is deep enough so that you can pull up the entire mass of roots. Some large clumps require an additional cut across the middle of the plant to dig them up.
- Remove soil. Rinsing with the garden hose will allow you to see where the crowns are separated. This will make the following step easier.
- Divide the crown. Use a sharp blade to cut the plant along the separation lines. Make sure that you have at least one growing eye per division, preferably 2-3 eyes to help the divisions grow larger and faster.
- Trim and soak. Remove all the dead leaves and damaged roots, then put your division in water for 5-10 minutes before planting.
- Prepare a new location. Find a spot in the shade or partial sun, make sure it has good drainage, and add compost to the soil.
- Plant at the same depth. The crown should be planted at the same depth at which it grew originally. After planting, water your divisions to remove air pockets in the soil. Spring division requires additional watering for at least a year after division. Fall division requires very little additional watering.
The Payoff
Some kinds of hosta need up to five years to reach full maturity, so don’t be too hard on your freshly divided hostas in their first year. If a mature hosta is looking sickly and there is lots of room, then the most probable reason is either lack of water or too much sun; overcrowding is rarely an issue. Provide your hostas with enough space, shade and consistent moisture, and by next summer, they will be thriving.

Troubleshooting: What Is Normal and What Isn’t
When dividing hostas, the new plants might show some signs of stress, and it’s important to know which are normal and which call for attention.
- Drooping leaves in the first week – normal. This is because the roots are trying to get reestablished in the soil, and they will be fine if the soil stays consistently moist; this condition should clear itself out in 7-10 days.
- Yellow/browned leaf margins soon after transplanting – normal, especially if some of the roots suffered damage during the division process. Remove all the browned parts, and let the plant channel its energy elsewhere.
- Wilting that does not resolve after a week of regular watering, or leaves that turn from wilted to mushy – not normal. Look for signs of rot, such as the plant crown turning soft and emitting a foul odor – it means that the plant was divided into the soggy and poorly-draining soil. If caught in time, the plant can still be saved – simply dig it out of the ground, cut all the damaged parts away, and re-transplant it to a better-draining location.
- Small/newly grown leaves with odd streaks and puckering coming out next spring – this might not be just division-related stress. Occasional small-sized growth is normal, but persisting mottling or streaks may mean that your plant suffers from Hosta Virus X instead; it could especially happen if your blade was previously used on other hostas. There is nothing that can be done about this disease – simply remove all the affected plants, so they don’t infect the rest of your garden.
- Not a single leaf came out by six weeks of growing season – sometimes this may happen due to insufficient root growth relative to the top growth.
