


Did you know that the carrots harvested in October can remain crunchy and fresh into March? And you will not have to freeze, can or put the veggies in your refrigerator. How do you do it? By storing them in boxes filled with moist sand. It sounds incredible, doesn’t it?
A carrot is a vegetable whose roots continue living after harvesting. After digging from the ground, carrots continue to respire, burning up carbohydrates stored during summer and losing moisture through the epidermis. Therefore, keeping the root vegetables in the refrigerator does not help; the environment inside is too dry despite low temperatures. By December, the carrot bends under pressure since the moisture evaporated from the veggie. Underground carrots live in moist environments that do not allow for evaporation.
Sand crates restore natural soil conditions, thus helping carrots stay fresh and crunchy during winter. Believe me; I dug carrots from moist sand crates last year that were tastier than when first harvested. This method beats any refrigeration storage option.
Read below to discover the carrot varieties ideal for sand storage, what type of sand to use, ideal storage location and the critical mistake that turns sweet carrots bitter.

The Ancient Sand Storage Method
Back when we didn’t have refrigerators, root cellars allowed individuals in cold climates to store their vegetables, such as carrots, beets, and parsnips. People stored these vegetables underground within wooden crates filled with materials like sand, sawdust, or peat. Individuals also chose not to use root cellars and opted to create outdoor clamps using layers of dirt and straw.
As strange as it may sound, this process makes sense if you think about it logically. Roots are stored best under the very same conditions in which they thrive in nature. Cold, dark, and wet conditions will give roots the longest lifespan possible. Wooden crates filled with sand allow you to replicate natural soil conditions inside of a root cellar.
Why Sand Keeps Carrots Fresh

Your carrot could spoil through any one of these three processes – drying out, rotting, and sprouting. Each of these spoiling processes occurs in stored carrots. While sand prevents each process from occurring, it doesn’t stop each one to the same degree.
Moisture is probably the number-one factor. Carrots continue respirating after being pulled from the ground. During respiration, water escapes through a delicate layer of skin incapable of retaining moisture. Wet sand allows water vapor to remain at high saturation levels around each carrot, reducing pressure on the roots to release water molecules. No wonder sand outperforms refrigeration.
Proximity matters. Rot spreads rapidly through a connected group of carrots sitting directly next to each other. Spacing out individual roots slows the rotting process, making it more difficult for the disease-causing organisms responsible for spreading rot. However, separating carrots in damp sand won’t entirely prevent the spread of rot.
Light inhibits chlorophyll formation. As carrots become exposed to light while sitting on your countertop or inside refrigerators, their shoulders change color from orange to green. Moreover, exposure to light may affect flavor negatively. But since sprouting depends primarily on time and temperature rather than lighting conditions, keeping carrots in the dark isn’t necessary.
What You’ll Need

You need very little. A wooden crate or an old apple box is the ideal container, because wood breathes. A 5-gallon bucket or a plastic tote will do the job too, provided you drill a few small holes in the lid or leave it slightly ajar so excess moisture can escape.
The sand matters more than the box. Use washed play sand or builder’s sand from the hardware store. Beach sand is tempting if you live near the coast, but it carries salt, and salt pulls water out of the roots, which is exactly what you’re trying to prevent. Keep a spray bottle nearby for dampening the sand now and topping it up later. A cheap thermometer is optional, but it saves a lot of guessing when you’re hunting for the coldest corner of the house.
How damp is damp? Squeeze a handful. It should hold its shape like a snowball and leave your palm cool, but no water should drip out. Too dry and the carrots shrivel; too wet and they rot.ags. No refrigerators drying things out. Just smart, old-fashioned practicality.
Only the Strongest Carrots Make It to Spring

Storage begins in spring, when you choose the seed. Long-keeping types tend to be dense, thick-cored and slow to mature. Danvers, Chantenay types such as Red Cored Chantenay, Autumn King and the hybrid Bolero all have good reputations in the cellar. Slender Nantes carrots are wonderful fresh but usually give up sooner.
Harvest late, but not too late. A light frost or two sweetens carrots, because the root converts starch to sugar as the soil cools. Lift them before the ground freezes hard, ideally on a dry day when the soil crumbles off easily.
Then sort ruthlessly. Only firm, unblemished roots go in the crate. Cracked, forked, nicked or soft carrots go to the kitchen this week, because any wound is an open door for rot.
Preparation is gentle and quick. Twist or cut the tops off, leaving about half an inch of stem, because leaves left on keep drawing water out of the root long after harvest. Resist the urge to wash. Rub off the heavy clumps by hand and let the light dusting of soil stay; scrubbing scuffs a skin that is already thin.
Finally, spread the roots out in the shade for a few hours so their surfaces dry. A carrot packed wet goes into the crate carrying its own mold problem.
Step-by-Step: Storing Carrots in Sand

The process is simple, but each step plays a role in keeping your carrots crisp for months. Here’s how to do it the right way:
1️⃣ Trim the greens — but don’t wash
Always cut back the leaves to create stubs that are about ½ inch long. Keep the thin layer of soil on the roots since washing removes any surface moisture while also damaging the outer layer of the root skin.
2️⃣ Lay a base
Spread 1 to 2 inches of damp sand across the bottom of the container and level it.
3️⃣ Add the first layer of carrots.
Lay them flat, side by side, with about an inch between roots. If you’re using a deep bucket, you can stand them upright instead, crown up, as they grew.
4️⃣ Bury them.
Cover with sand until no carrot shows, then add another inch on top.
5️⃣ Repeat, then label
First, alternate layers of carrots and sand. Once your bucket is filled, cover everything with an extra inch of sand and label it with the date and type of carrot. By February, you will appreciate doing that.
6️⃣ Move it into place before it gets too heavy.
A full crate of damp sand is far heavier than it looks, so pack it where it will live, or put it on a dolly first.
The Ideal Storage Conditions

Carrots last longer than other crops when stored at 32°F in high levels of humidity.
It appears that you won’t need to worry about humidity as the sand will handle this part of storing carrots. However, you’ll still need to focus on ensuring the carrots stay cool. The ideal range is between 32°F to 40°F, with colder temperatures being preferred for longer storage periods.
Temperatures under 30°F lead to the carrots freezing and thawing into mush. Also, avoid large fluctuations during the day since this causes condensation. Rot will form within your produce due to moisture.
Typically, most homes have spots like an unheated basement corner, root cellar, crawlspace, or even an insulated garage. Keep track of your region’s temperatures because there could be major differences based on geographic location.
For instance, the garage in Minnesota could easily get down to 20°F or lower in the middle of January. On the flip side, it might hover somewhere between the mid-50s in Georgia, making it unsuitable for carrot storage beyond a couple of weeks.
Regardless of whether you plan on storing your carrots above ground or in your basement, it’s important to remember never to place any apples or pears in the same area. These ripening fruits release gases that alter the taste of stored carrots to give them a bitter flavor profile.
Monitoring & Maintenance
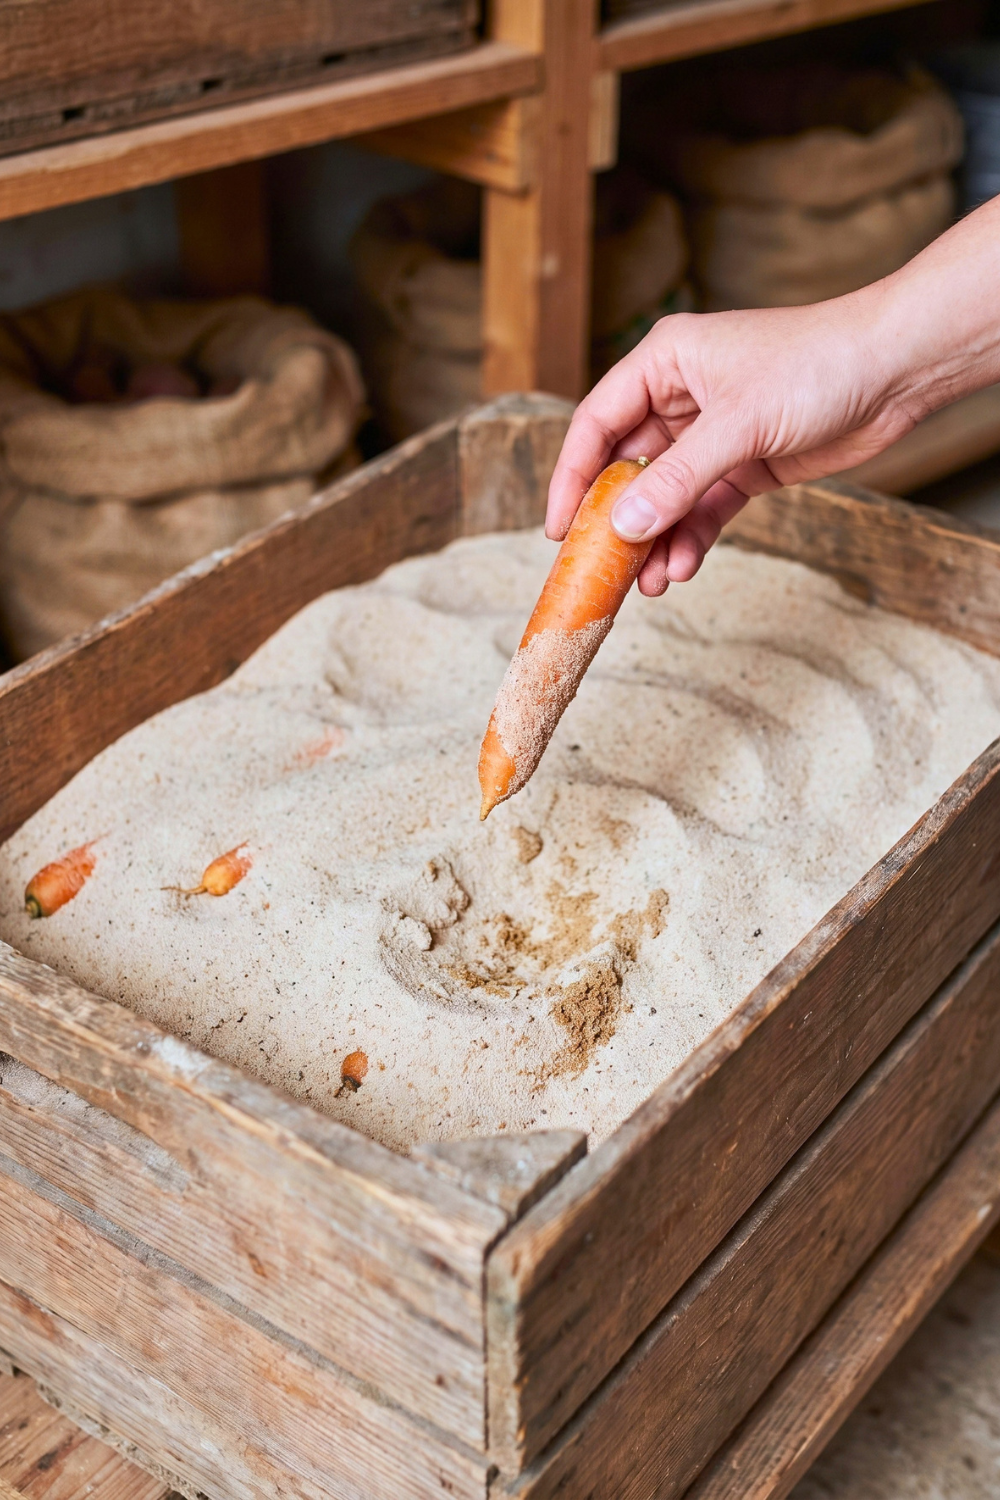
Every month, take the extra few minutes when digging into your food storage area and feel the soil. Pull out some roots, and smell your storage area. If it smells fresh and feels just like the garden beds, then it will do its job in keeping produce fresh for consumption. There is no need to waste a soft carrot either. Simply cut the ends off and let it soak overnight in a glass of cold water.
Bonus: Storing Other Root Veggies

Carrots are among the most common vegetables stored in the root cellar, along with others. However, these vegetables must meet certain requirements when storing. These vegetables include carrots and other root crops. Therefore, let’s take a look at other vegetables that you should know about keeping carrots company in your root cellar.
You will store your beets similarly to carrots; however, ensure that there is about an inch of stem left. In addition, make sure to store your beets without breaking the taproot, or they may bleed. On the other hand, parsnips can also be stored like carrots, and even better because frost enhances their sweetness. Moreover, you can also store rutabagas and turnips like carrots. Turnips tend to develop soft spots easily, so they require more space. Winter radishes and daikon are another set of vegetables that remain crispy after being kept inside the root cellar for two months.
Lastly, keep your potatoes out of the sand box. They prefer a temperature range of 40–45°F.
Common Mistakes & Easy Fixes

|
What you notice |
What it means |
What to do |
|---|---|---|
|
Carrots limp and bendy |
Sand has dried out |
Mist the sand lightly and mix it through |
|
Carrots soft, slimy or dark at the tip |
Rot |
Remove the root and the sand around it |
|
Musty or sour smell |
Rot somewhere in the crate |
Dig through and find it now, don’t wait |
|
Sand clumped and wet |
Too much water |
Open the lid for a few days, or mix in dry sand |
|
White hairy sprouts at the crown |
Too warm |
Move the crate somewhere colder; snap off sprouts |
|
Bitter taste |
Ethylene from nearby fruit |
Move fruit to another room |
Let Your Carrots Sleep in Peace
Cleaning fresh carrots straight out of the ground in mid-winter while snapping them in half will provide one of those simple pleasures in gardening. The flavor of these carrots may remind you of autumn – sweeter than regular carrots because you’ve been storing them during the colder months.
But storing carrots isn’t hard work. All you have to do is choose healthy root vegetables to keep, leave the dirt attached, and cover them in wet sand inside a cool environment. Then make sure they stay separate from any fruits that produce gases, such as apples. Check on them monthly, and you’ll still have carrots come planting season.
