


A bird bath will attract far more birds than any feeder could hope for – it just works! Seeds, fruits, and bugs aren’t difficult for birds to find; however, finding fresh water isn’t quite so easy – particularly in periods of drought or freezing temperatures. Providing a steady supply of water in your garden guarantees visits from robins, finches, bluebirds, and even chickadees!
It’s essential to understand that an effective bird bath isn’t necessarily something you should purchase from your local nursery and spend a fortune on. In actuality, many of the prettiest bird baths are constructed using common household items such as plates, tubs, fallen logs, or rock piles gathered along your property line. Not only does constructing your bird bath allow you creative freedom in crafting your bird oasis but it’s incredibly affordable!
See below for a collection of easy-to-follow 18 DIY bird bath ideas and instructions showing the final product. Keep your bird bath depth to no higher than 2 inches. Furthermore, providing birds with a rough or textured material will offer them ample footing. Finally, make sure to locate your bird bath near shrubs and trees so that your backyard birds have a quick escape route.
1: Upcycled Vintage Glassware Tiered Bird Bath
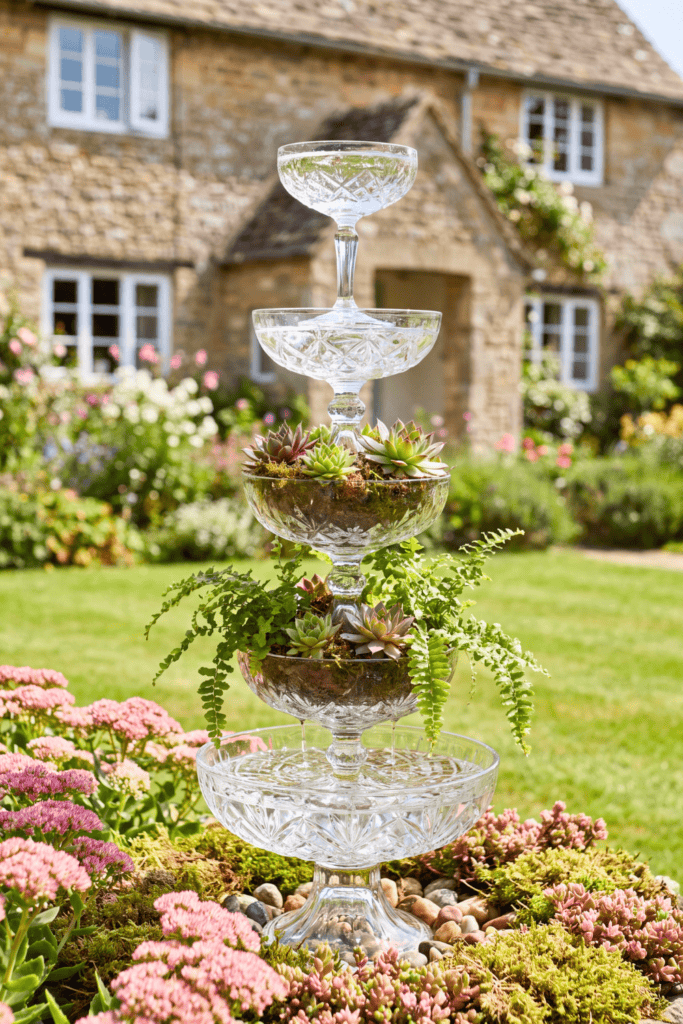
Select a large, flat glass dish or shallow bowl for the basin. Next, choose two or three strong vases, candle holders, or upside-down bowls for the stems. Clean all of the parts, stack them in an attractive manner, and seal the joints with 100% clear silicone glue or epoxy formulated for use on glass. Let it dry for a full 48 hours before adding any water. Glass can be very slippery, so spread a few flat stones from a riverbed along the bottom of the basin for the tiny birds to stand on. Display your work on a flat surface, or bury the bottom of the basin an inch down into gravel so it doesn’t tip over.
In the garden, it looks like a jewel. The amber, cobalt, and pressed glass will capture the rays of the sun in the morning and create colorful spots on the lawn. It seems to belong in a cottage garden among lady’s mantle or thyme.
2: Cast Stone Leaf Basin With Natural Pebbles
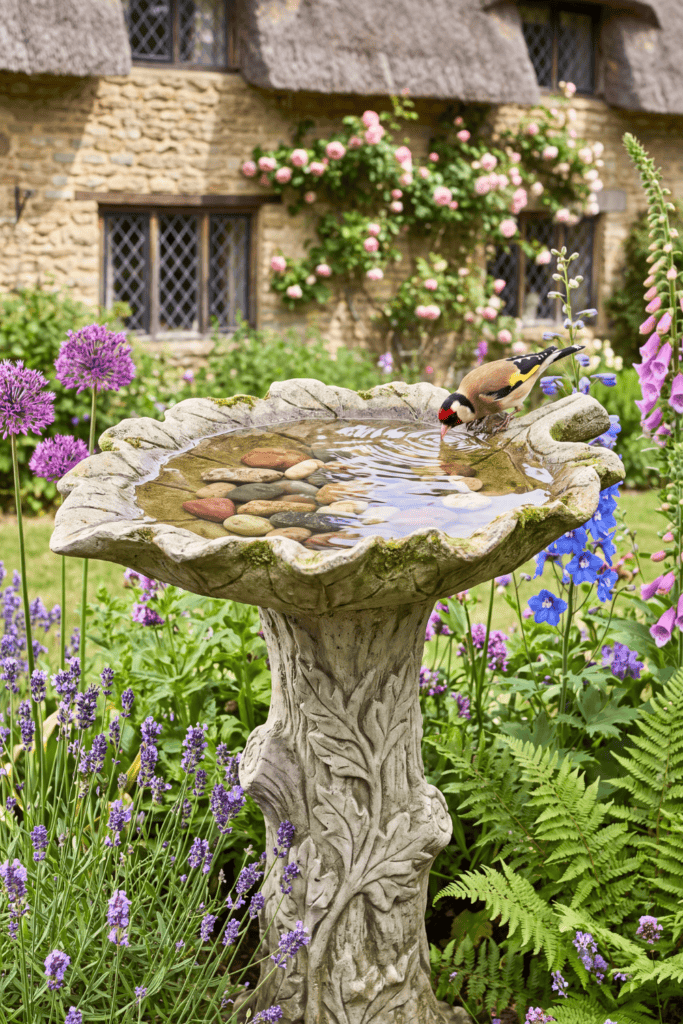
This one uses a real leaf as the mold. Choose a large leaf with strong veins, such as rhubarb, hosta, gunnera, or elephant ear. Pile damp sand into a smooth mound, cover it with plastic wrap, and lay the leaf on top, vein side up. Pack a stiff mix of sand-topping concrete over it about ¾ inch thick, making it a little thicker in the center. Cover the casting and leave it alone for two days. Then peel off the leaf and mist the concrete daily for a week so it cures slowly. Before birds use it, soak it in water for several days and drain it a few times to leach out the lime.
The result looks like a fossil. Every vein and rib is pressed into gray stone, and a handful of smooth tan and charcoal pebbles collects at the deepest point. Set it on the ground among ferns or hostas, and it looks like it’s always been there.
3: Rustic Galvanized Tub On A Stacked Stone Pillar

Start by finding a small galvanized pan or washtub that will act as your bird bath’s bowl. Preferably, find an older piece of equipment that is already worn to its characteristic soft gray color. Fresh galvanized metal tends to leach zinc into your water, so be mindful of this during construction. Begin by stacking your flat fieldstones or flagstones into a tower measuring between 24-30 inches tall. Remember to stagger your joints and regularly check to ensure you stay level at the top of your tower. Once you’ve completed your tower, simply place your galvanized metal pan on top. Finally, fill your bird bath with a layer of gravel, and a couple of large flat stones sloping from ¼ inch along the edges to roughly 2 inches deep in the center.
Aesthetically, the appearance of this project screams farm. Silver-toned metal sits atop a tower made of rust-speckled and greenish gray stone – perfect for placement near a chicken coop or vegetable garden area.
4: Whimsical Stacked Vintage Teapot And Floral China
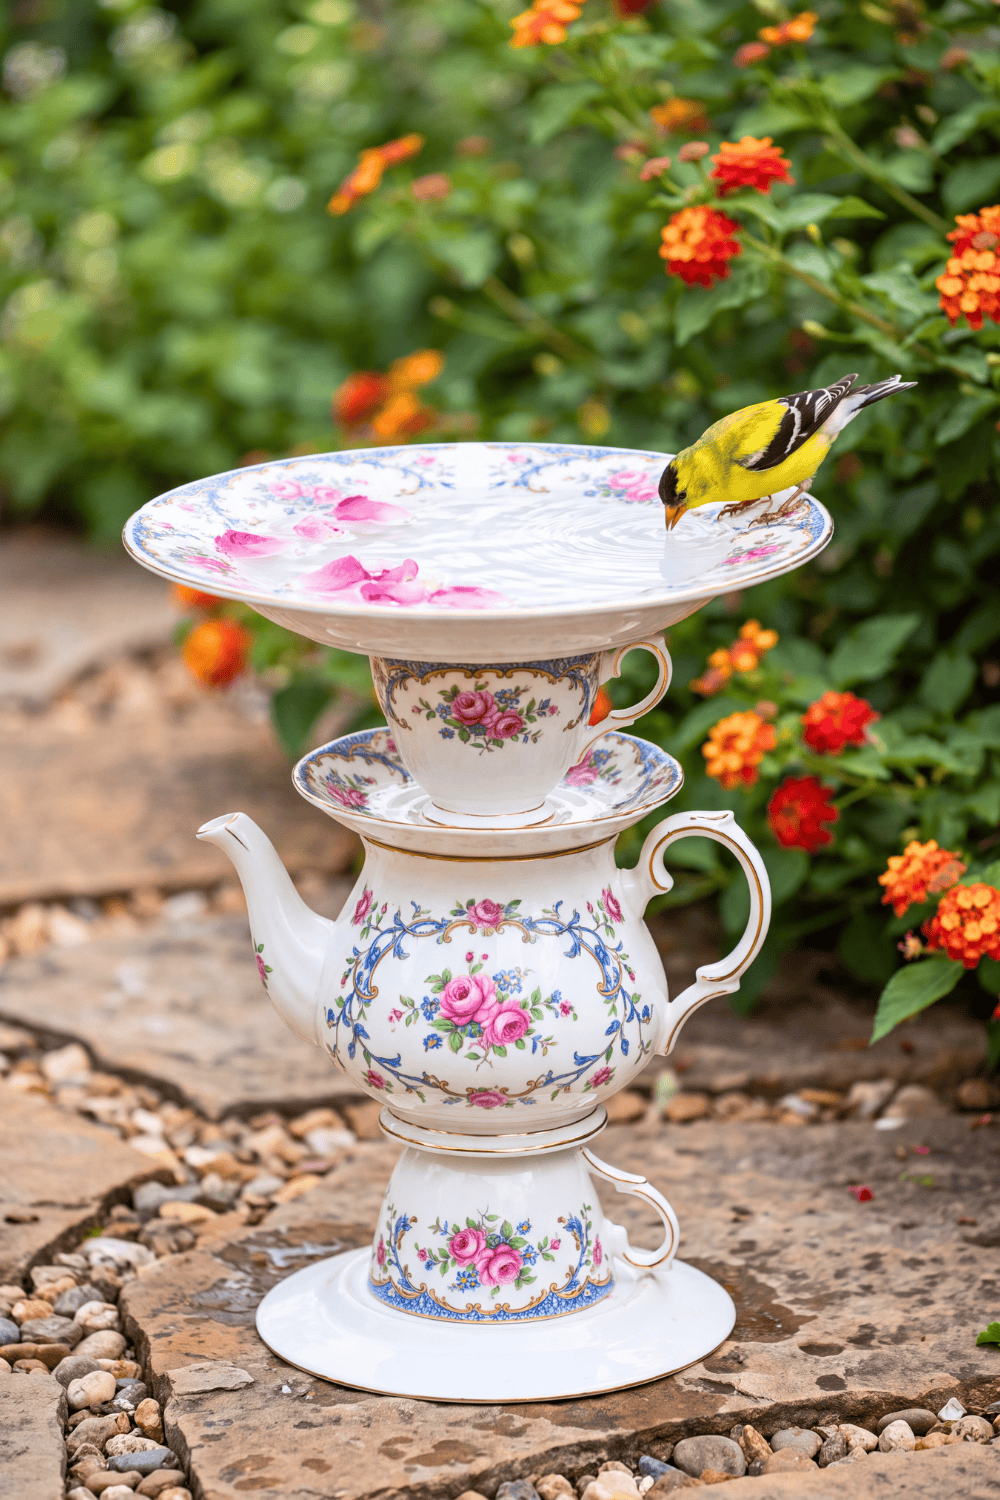
It’s time for some creative scavenging at the nearest thrift store! To begin building your DIY bird bath, you’ll require a dinner plate for the basin component. In addition to teapots, sugar pots, cups, and saucers, you will also require various teacups. Start by laying out the pieces and flipping certain items upside down on the tabletop in order to construct the stack.
Using exterior-grade epoxy or clear silicone sealant, attach each connection point between components. For further reinforcement of the structure, drive a section of rebar or threaded steel rod through the central axis of the stack. One final thing: Some antique finishes include trace amounts of lead paint. Ensure that the basin piece, in particular, does not contain any lead paint and is food-safe. The stem component can be built with vintage pieces of unknown origins.
Assemblage of your bird bath results in a charming English tea set appearance! Pastel hues, rose decorations on fine china, and gilded edges tower upward to about knee level on your bird bath with a whimsically angled teapot spout. A true conversation starter in your herb garden!
5: Natural Hanging Coconut Shell Water Station
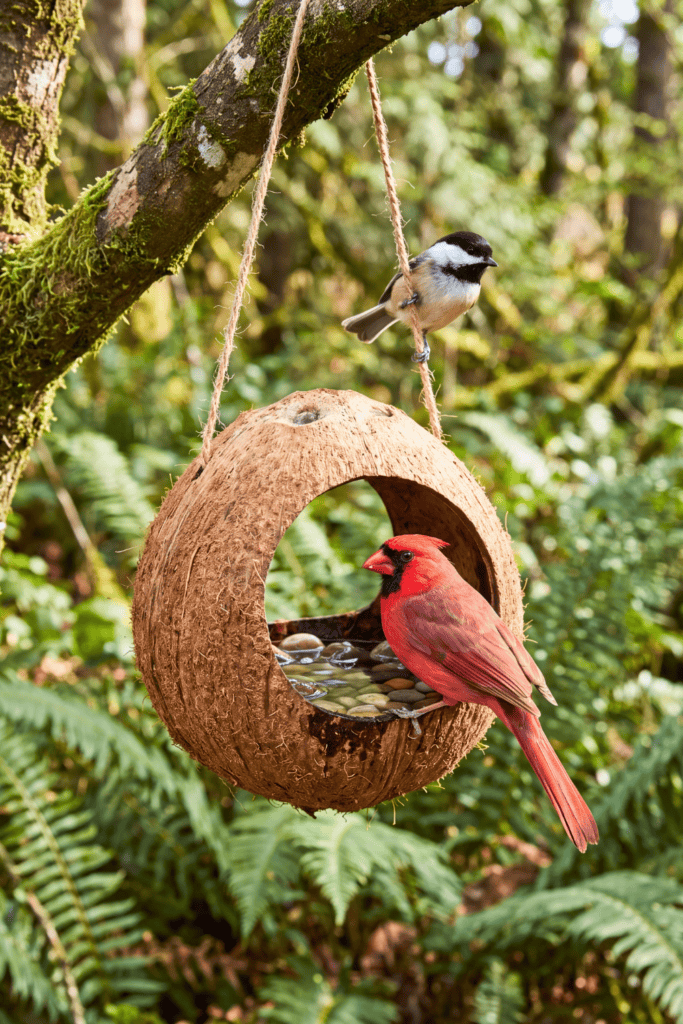
Split open a mature coconut along its middle and remove the meat, allowing the husk to dry out for about a week. Using your power drill, drill three evenly-spaced holes near the rim of the coconut. Using natural jute twine, sisal rope, or lightweight chains, tie each line through each of the holes. Tie off all three lines together in a knot or split-ring formation. Lightly sand the interior surface for traction purposes; however, be careful not to seal your coconut bath since the majority of sealants cannot come into contact with potable water. Hang your coconut bird bath from a low-lying tree branch or shepherds hook in partial sunlight. Make sure to keep your coconut bird bath full due to evaporation!
This particular coconut bird bath has a rustic appearance and feels very tropical in nature! The brown, hairy husk moves with the breeze on your jute lines. Perfect for wrens, finches, and chickadees who do not frequent larger bird baths! Try grouping a few coconuts at varying levels for some whimsical decoration!
6: Suspended Glazed Ceramic Bowl On Rustic Chains

Find a wide and shallow ceramic stoneware bowl with a frost-proof finish. The bowl should measure between 12-16 inches wide, with a gentle slope on its sides. Drilling holes in ceramics isn’t easy; therefore, it’s advised to support the bottom of the bowl with either a macramé sling or chain link wire. In addition, use three pieces of chain that you’ll be able to obtain second-hand at your local junkyard as rusty swing chains or even fence chain. Join the chains to a single hook and hang the bowl from a strong tree branch or pergola beam, high enough off the ground so the birds can watch out for any predators.
Contrast is key when creating this stylish bird bath. A glossy ceramic bowl in hues such as turquoise, celadon, or deep cobalt contrasts beautifully against the heavy chains in rust orange colors. Reflections of tree leaves are cast upon the water, creating shadows and light patterns as it slowly sways back and forth with each gust of wind. Ideal for tiny gardens without the room for a pedestal-style birdbath.
7: Zen Carved Stone Basin With A Water Spout

Selecting a piece of softer stone such as sandstone or limestone, you could even mold yourself a hypertufa stone using equal parts of Portland cement, peat, and perlite. Carefully create a hollowed-out basin at the top of the stone piece. Place a piece of angled bamboo next to the basin, and run tubing from either a tiny solar-powered pump or battery-operated pump from within a covered gravel reservoir located underneath. Be sure to adjust the output rate to a slow and consistent trickle – moving water not only serves to draw birds in but keeps mosquitoes away!
The inspiration behind the traditional Japanese tsukubai design includes a moss-covered stone basin that slowly trickles water through bamboo with the continual sound of dripping water. Surround your tsukubai creation with plants such as Japanese forest grass, mondo grass, and ferns. Complete your ground area with polished black river stones.
8: Bright Blue Glass Mosaic Dish On A Classic Pedestal
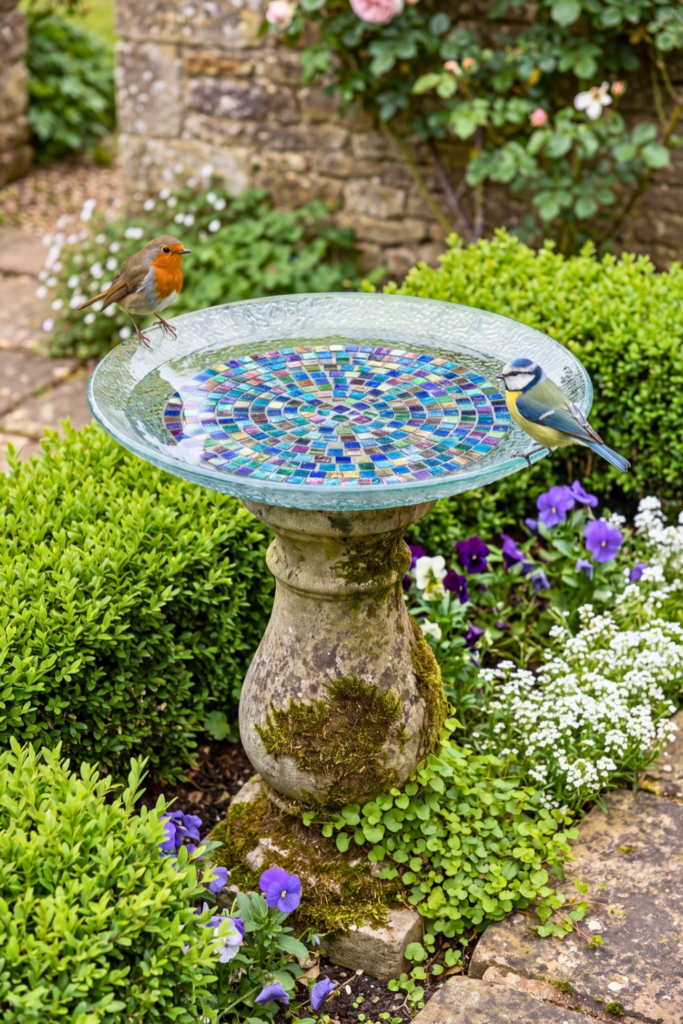
You begin by selecting an existing or new pedestal bath made of concrete. It is important to clean your basin before beginning this project. To make a functional bird bath out of your mosaic, use cobalt, sapphire, and aqua colored glass tiles arranged in patterns such as spirals, sunbursts, or concentric circles. For safety purposes, you should use tumbled glass tiles for the basin flooring to prevent birds from slipping. Fill the gaps between tiles with sanded grout in either gray or white. Remove excess haze and allow your mosaic project to cure for one week.
Next, seal the grouted joints only using non-toxic sealant. Allow your piece to breathe prior to introducing water. Once completed, your new mosaic bird bath will resemble a pool of sky. When sunlight passes through the water, the blue-tiled mosaic underneath lights up to create a glowing effect. Situating your finished mosaic in a sunny garden with plants such as white phlox, silver lamb’s ear, or yellow coreopsis creates the perfect backdrop.
9: Painted Terracotta Pot Stack With A Solar Bubbler

Three terracotta pots of different sizes and one wide terracotta saucer for the top are needed for this project. Begin by turning the biggest pot upside down. Add another upside-down pot to it. Repeat until you’re happy with how big you’ve made the stand. Each joint should be glued together using outdoor construction adhesive. Finally, add the saucer to the top of the stand. It sounds like there’s no limit to the amount of customization available here. Once dry, paint the outsides of the pots using exterior acrylic paints in a variety of fun designs, including stripes, polka dots, or even folk-art inspired floral patterns. Keep the inside of the saucer bare. Once the paint has dried, seal the painted surfaces with an exterior clear water-based sealer.
To really bring your terracotta birdbath to life, add a miniature solar-powered bubbling fountain to the topmost saucer. This fountain will keep your birdbath full of fresh water.
10: Vintage Ladder Cascading Teacup Fountain

If you have a discarded wooden ladder laying around, lean it up against your fence or wall, or use an A-frame style ladder in your flower bed. Fasten it down tightly so it won’t move during the project. Attach a teacup or small bowl onto each rung so they slope downward slightly, positioning each lip directly over the mouth of the teacup beneath it.
A basin will be needed at the bottom to catch the falling water, hiding the pump within its depths. Connect tubing along the back of the ladder from the basin all the way up to the top teacup. Once activated, water cascades from cup to cup creating an absolutely charming sight!
The effect achieved with this water fountain is both whimsical and charming! Decaying paint, rustic wood, and the ladder adorned with floral teacups are enhanced by the sound of dripping water. This water fountain has all the elements of a true vintage farmhouse treasure!
11: Hand Carved Natural Wood Burl Basin
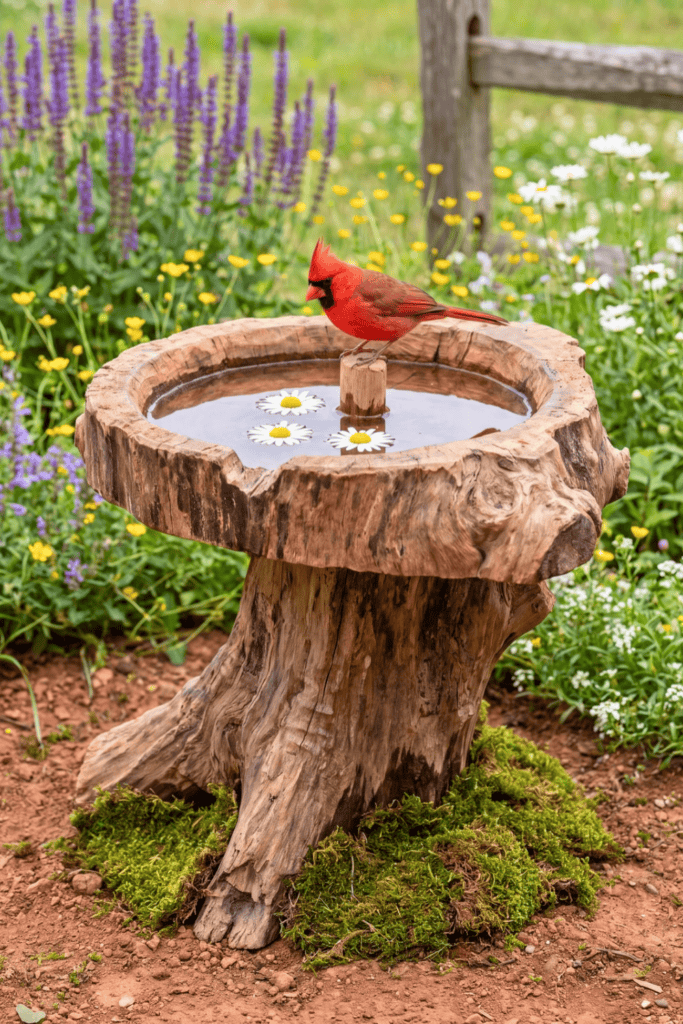
It’s important to search for hardwood burls and/or large rounds of oak, maple, or walnut logs that have had at least a full year to season. Using an angle grinder equipped with a carving disk, or even just a gouge and hammer, hollow out a small basin. Ensure there is a slight sloping angle from rim to center that reaches no higher than 2″ deep. You can achieve a beautiful finish without sanding it too perfectly – after all, it’s all about natural beauty here!
Leave it bare or, alternatively, treat it with food-safe tung oil. Once the basin is completely cured, set it upon a stump or low rock. Empty it during freezing temperatures to prevent splitting!
As previously mentioned, this wooden basin takes advantage of all-natural wood beauty. Knots, swirling grains, and a wavy edge of the burl result in a stunningly beautiful honey-colored basin that deepens its coloration with exposure to moisture.
12: Hanging Vintage Bowl With Trailing Ivy
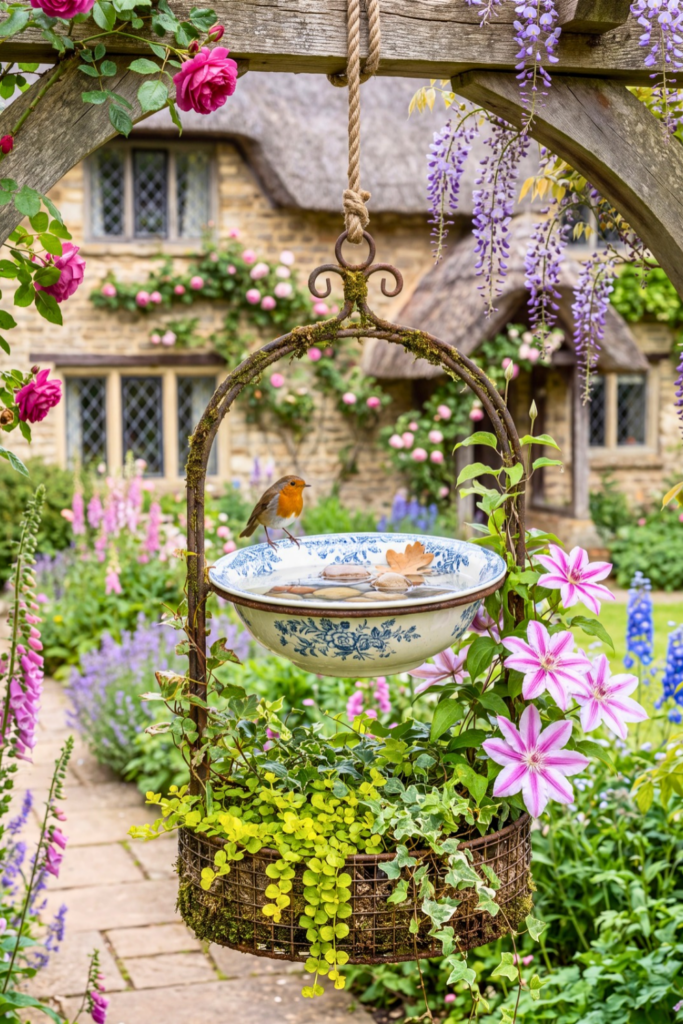
For this charming bird bath idea, you’ll need a shallow metal basin like an enamel or ironstone bowl or a vintage metal pan. To display your basin, create a hanger using wire, chains, or even macramé, then attach it either to a wall bracket or porch post. Hang it at approximately eye-level height. In a smaller container above your chosen hanger, grow trailing plants such as ivy or creeping jenny vines. Carefully guide these to weave over both the chains and hangers to hide them from view.
With its elegant simplicity, this is a charming garden design. An aged metal basin is cloaked in a curtain of greenery as if it belonged in the gardens of an English cottage home. This gives the birds the sense of security they seek while enjoying their bath. Plus, it looks lovely against a shaded porch backdrop.
13: Terracotta Saucer On A Rustic Log

There isn’t anything simpler than making this birdbath! To start, cut a piece of fallen tree trunk approximately 2 feet long. Make sure the ends are relatively even. Select a large terracotta saucer, ideally measuring around 16 inches. Position your trunk vertically, place the saucer on the top, and affix it using some outdoor construction adhesive. Insert a flat stone in the middle for the birds to land on. For extra security, apply a waterproof sealant to the bottom of the saucer to prevent water from leaking out, but leave the interior open.
This bird bath is earthy-chic at its finest! A piece of tree trunk with bark still attached and a bright orange terracotta dish blend seamlessly into either a cottage or rustic garden. In addition, over time moss and lichens will grow up the sides of the log.
14: Hollowed Tree Stump With A Solar Fountain
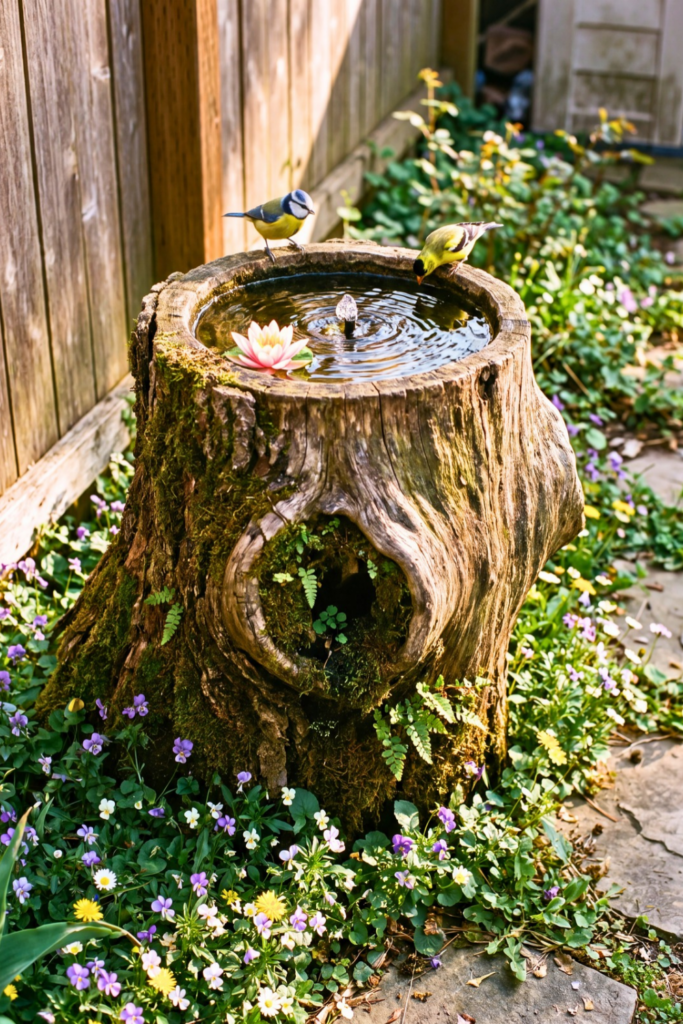
If you have the remains of the old tree stump sitting in your yard, then why buy an expensive birdbath or spend extra money building one? With a chainsaw, or even a regular drill bit attachment, cut out the top of the stump and create your very own birdbath basin! Depending upon how wide your basin is, line it with pond liner material or place a plastic saucer at the bottom to collect the water. You can cover your basin edges with moss, small stones, and pebbles. In addition to a small solar-powered fountain, incorporate a stone ramp to ensure your birds are able to reach the water without falling. Lastly, position your solar panel towards the sunniest area.
Your tree stump birdbath resembles nature itself! This rustic-looking birdbath features a gray-brown tree stump with a bubbling basin located directly in the middle. To enhance the effect, consider planting hosta, foamflower, and fern plants around the base of the stump!
15: Mosaic Trimmed Terracotta Planter And Bird Bath Combo
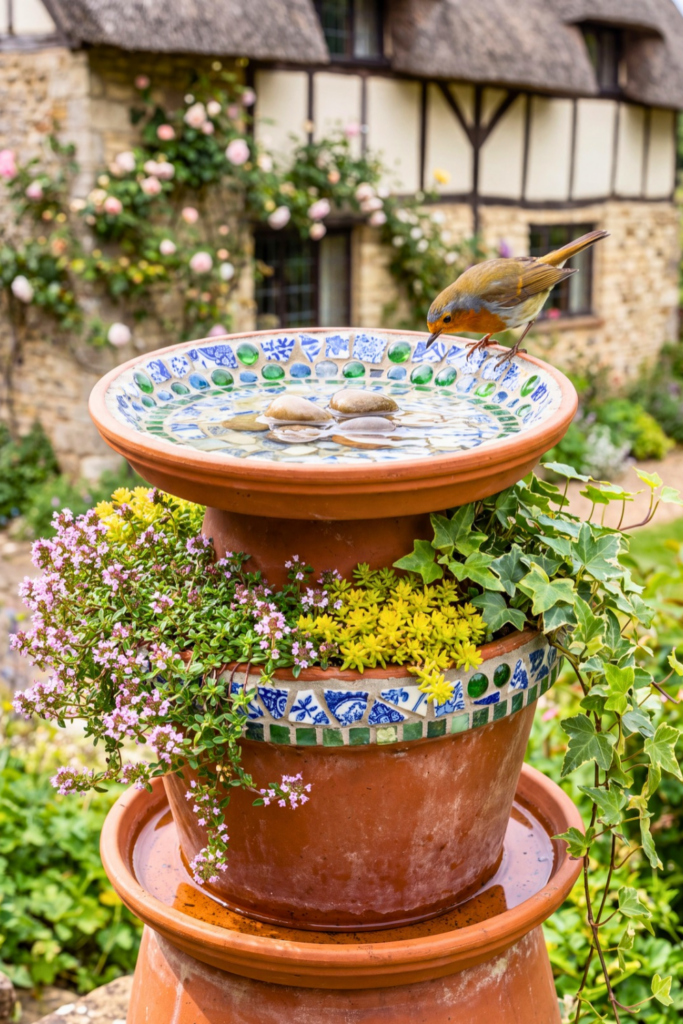
For this DIY bird bath, you will need a big, broad terracotta pot. Fill your chosen pot with some dirt and plant either some annuals or herb plants. Good options include sweet alyssum, nasturtiums, creeping thyme, or even some oregano. Then, place your terracotta saucer upside down across the opening of your pot. Make sure your saucer stays in place using an outdoor adhesive glue.
Then, cut out a section from the rim of both your pot and saucer using broken pieces of tile, China plates, or even pieces of glass. Arrange these items along your pot rim using thinset mortar, then fill in the gaps using grout. Be sure to leave your saucer interior untrimmed, exposing its raw texture.
This beautiful project creates two features in one! Not only will your birds get something to drink from, but they will also enjoy perching among your plantings while catching insects.
16: Carved Boulder Basin On A Rock Pedestal
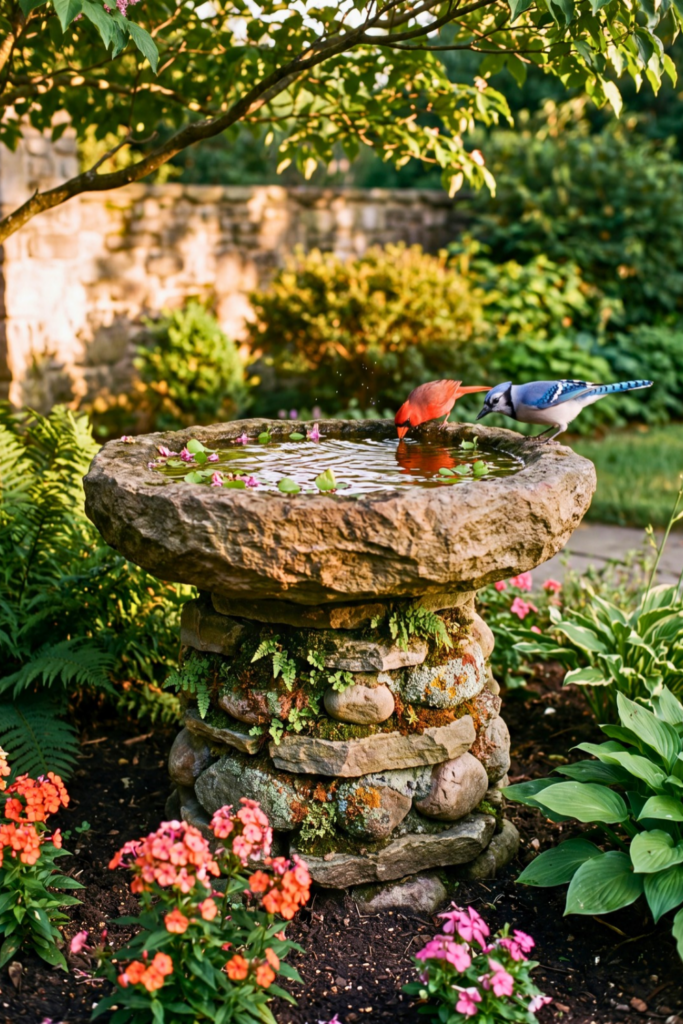
Find yourself a boulder with a flat top, ideally sandstone or limestone. Then locate a rock that is strong enough to act as the pedestal for your creation. Using an angle grinder fitted with a diamond cup wheel, grind a shallow bowl into your boulder’s surface, constantly wetting the stone to minimize dust. Protect yourself from the dust, noise, and sparks by wearing protective gear.
Polish the surface of your basin using diamond hand pads until it feels rough to the touch to ensure proper traction. Finally, place your boulder onto your chosen pedestal rock using either mortar or specialized construction adhesives formulated for stone.
Your bird bath design will resemble an ancient and stately water feature. The natural appearance of a boulder sitting atop a rugged pedestal rock, collecting rainwater in its basin, will complement gardens featuring native plants, such as sedums, little bluestem, and coneflowers.
17: Dry Stacked Stone Well Bird Bath

With flat rocks, create a circular wall structure that measures 18 to 24 inches tall and around 2 feet wide – essentially, creating a tiny well for your yard! Make sure to stagger each course on top of its predecessor, tilting your rocks in towards the center for added stability. Fill the central area with gravel until several inches under your top row of stones. Finally, place your basin, which could be anything from a hypertufa bowl to a used baking pan or even a giant saucer, in the center and situate it within the ring.
Your bird bath design will mimic a rustic well structure, featuring a circle of gray and tan fieldstones surrounding a small pool of water. Over time, expect the crevices between each rock to grow moss. Creeping thyme or sedum plants nestled in between your rocks will give your yard ornament an abandoned farm feel!
18: Rustic Metal Tub Under A Flowering Trellis Arch

For maximum charm, incorporate either a purchased garden archway or a rustic cattle panel archway made by bending cattle panels around two T-posts. Bury a weathered washtub or livestock pan in the center underneath your garden archway on top of a few large rocks. Fill the tub halfway up with river rocks, creating an inch or two of water along the edge. Finally, plant climbing roses, clematis vines, honeysuckle vines, or scarlet runner beans to grow up around your arch.
The floral archway garden is undoubtedly the most whimsical garden addition featured in this guide. A vintage weathered tub is overflowing with water below a flowering arch brimming with petals gently floating on top. This garden design attracts many visitors due to its beauty and functionality. Hummingbirds flock to the blooming flowers while birds climb up and down through the vines looking for a place to observe or hide.
